If you're looking to satisfy your feline's scratching instincts, consider a DIY cat scratching post.
Getting crafty in your home is the perfect way to get the exact look and feel you want for your cat's post, while saving a bit of money along the way. For when the best scratching post doesn't quite cut it for your feline friend, only DIY will do.
A popular trend in the pets world involves hiding unsightly cat litter boxes, houses and cat beds and transforming them into something so beautiful that they seamlessly integrate into the home. Who wants to see an ugly box strewn with cat litter when you can try out the super stylish DIY hidden litter box trend instead?

These DIY cat scratching posts might just be easier to create than you think...
1. DIY cat scratching post vase

Do you have an old vase just lying around? Turn it into something both chic and practical with this handy tutorial by TikTok user Darla James.
To make your own DIY scratching post vase, you’ll need the following items:
• An old vase
• Hot glue gun
• 200ft sisal rope
• Protective gloves
Directions
1. Dot a small amount of hot glue along the bottom of the vase.
2. Wrap sisal rope around the vase, dotting small hot glue dots as you go around and up.
3. When you reach height where you want to stop, cut the rope, tuck in the end piece and secure with a small dot of hot glue.
2. Natural DIY cat scratching post
If you don't like the look of cat scratching material at all, then why not go back to basics with this clever natural DIY cat scratching post?
Devised by CatVisors, this stunning looking post will make a real statement in any home.
To make your own natural cat scratching post, you’ll need the following items:
• A board/chipboard (as the base)
• A wooden stump, with the bark intact
• A drill/screwdriver or a hammer and nails (to fasten the stump to the base)
Directions
1. Fasten the base of the future scratching post to the stump with the tools.
2. Place it wherever your cat likes to scratch or stretch out the most.
3. Baby Yoda DIY cat scratching post

What can you do with a dollar store cat scratcher? Turns out quite a bit! The extraordinary cat toy designer Cat Toy Lady shows just what you can do on a budget with this inspired Baby Yoda design, from Star Wars' series The Mandalorian.
You can follow along with the tutorial over her own YouTube channel.
To make your own Baby Yoda DIY cat scratching post, you’ll need the following items:
• Dollar store cat scratchers
• Non-toxic green and black paint
• Sponge brushes
• A box cutter
• Exacto knife
• Hot glue guns
Directions
1. Make the base for your Baby Yoda by gluing six dollar store cat scratchers together to create a box shape.
2. For the top of the jacket/scarf, cut the top edges off a dollar store cat scratcher.
3. For the face, create a slightly curved shape by adding a couple of smaller pieces of dollar store cat scratcher and cutting.
4. Reinforce the back of the Baby Yoda face using another couple dollar store cat scratchers.
5. Glue the face to the top of the base using a hot glue gun.
6. Glue the top of jacket/scarf to the base using a hot glue gun.
7. Create the top of Baby Yoda's head by cutting out smaller squares of dollar store cat scratcher and gluing them together.
8. Create some Baby Yoda shaped hands and ears from the dollar store cat scratchers and glue them to each side of the body, reinforcing them with a few added similar shaped pieces glued together.
9. Paint Baby Yoda's face, ears, hands and head using the green paint and leave to dry.
10. Once dry, use a fine brush to draw and fill in his eyes and mouth. You can cut out a guide for his eyes to ensure both are equally shaped.
11. Add shading to his ears using black paint and leave to dry.
4. Cardboard box DIY cat scratching post

Does your kitty love to sit in cardboard boxes? Why not transform it into a handy cat scratcher? TikTok user @jeriann094 shared the idea on their channel.
To make your own cardboard box DIY cat scratching post, you’ll need the following items:
• Cardboard boxes (3 large or 5 medium)
• Duct or masking tape
• Box cutter and straight edge
• Fabric (optional)
Directions
1. Cut cardboard boxes into 4 inch strips
2. Roll a strip of cardboard up tightl. When you get to the end of it, duct tape it to another strip of cardboard. Repeat rolling and taping until your scratching pad measures is at least 16" across.
3. You can also add fabric if you like by cutting a piece that's the same size as the scratch pad and gluing it to the cardboard.
5. Cactus DIY cat scratching post

Get on trend with this seriously stylish Cactus DIY cat scratching post created by Penelope Quinn for Create and Craft.
To make your own cactus DIY cat scratching post, you’ll need the following items:
• 50cm x 50cm plywood, approx 2.5cm deep
• 50cm x 50cm fake grass
• 2 part plastic Christmas baubles
• Green spray paint
• 54 metres of natural sisal rope
• 2 packets of green dye
• Glue sticks
• Glue gun
• Hammer
• Electric drill
• Strong glue such as Gorilla Grip
• Sand or concrete
• Felt to make flowers
For the pipe
• 60cm of 80mm pipe, cut into 8cm pieces
• 6 x 80mm connectors
• Toilet flange to fit 80mm
• 80mm 43 degree bend
• 80mm 95 degree bend
• 2 x 95 degree junction
Directions
1. Begin by dying your sisal rope using the dye and soak overnight.
2. Center the flange onto your board, and mark with a pencil where the screws will go. Use your electric drill to pre-drill the holes, and then secure your flange with screws.
3. Cut a hole in your fake grass so it fits snugly over the flange. Glue it onto the board. Put your first connector onto the flange; if it doesn’t fit 100% snug, apply plenty of glue.
4. Take one of your 8cm pipe bits you have cut, and hammer this gently into the connector.
5. Keep going, using a pipe in between each connector until you have 4 connectors stacked on top of each other, held together with 5 pieces of 8cm pipe.
6. Fill with sand or concrete to help keep it steady.
7. Attach a 95 degree junction, followed by an 8cm pipe, and a 45 degree bend.
8. Connect your second 95 degree junction. For the second arm of the cactus, use a connector, and the 95 degree bend.
9. Break your plastic baubles in half, and use a glue gun to secure to each of the arms, and one on top.
10. Spray paint your cactus green. It doesn’t need to be a perfect finish.
11. Take your dyed sisal rope, and begin to glue gun it around the base of your cactus, continuing up.
12. When you reach a junction, criss-cross over a couple of times, then keep working your way up until you’ve covered the entire cactus in rope.
13. Cover the spaces by measuring up smaller pieces of rope, and gluing them in.
14. Add a couple of flowers and pom poms, and it’s ready – there’s nothing left to do, but leave it out for your fur baby to enjoy!
6. Rainbow cat scratching post

We love this idea from Shrimp Salad Circus – an innovative design, and perfect for if you don't have a lot of space.
To make your own, you need:
- Wooden base: 2 x 8 board cut to 22 inches long
- 0.5-inch wood or MDF for rainbow
- 100-foot package of .25-inch sisal rope
- Four metal L brackets
- 10 screws, 0.75 inches long
- Pencil/chalk
- Sandpaper
- Hot glue gun
- Scroll saw or Dremel with wood cutting attachment
- Drill
- Cloud template
- Rainbow template
Directions:
1. Sand the wooden base to smooth away any rough edges.
2. Trace the cloud template onto the base about half an inch from each end with a pencil or chalk.
3. Paint the clouds white using chalk paint, then leave to dry.
4. Trace the rainbow template twice onto 0.5-inch thick wood.
5. Cut out the two rainbows using a saw or Dremel tool.
6. Screw the two rainbows together.
7. Attach a bracket to each side for a total of four. Use 0.75 inch screws instead of the ones that came with the brackets so that they go through both pieces of rainbow. Refer to the template for where to attach the brackets.
8. Hot glue the end of your sisal rope to one side of the rainbow, and then wrap the rainbow tightly from one end to the other.
9. Position the brackets inside the clouds, and screw the rainbow onto the base.
7. Carpet scratch post

Another simple yet ingenious idea, this one is as easy as wrapping some carpet around a bit of wood. Okay, so there's a little bit more to this idea from Popular Science, but it looks so regal you'd never know its pulled together from household carpet.
To create your own attractive yet durable design, you will need:
- Drill
- Hammer
- Staple gun or glue
- Scissors or box cutter
- Wooden post
- Wooden base
- Two 3-inch wood screws
- Carpet
- Padding
Directions:
1. Find the center of the bottom of the post, and mark two spots where the screws will need to go.
2. Do the same for the base, making sure they're 2 inches apart.
3. Drill holes in the post and base.
4. Begin stapling the carpet to the post. Place the carpet about midway along one side of the post, and staple up and down along the edge of the carpet.
5. Roll the post to wrap the carpet around it, pull it taut, and attach with staples.
6. When you get back to where you started, measure and cut the carpet so the two edges lie flush.
7. Staple along the edge of the carpet. Use a hammer to make sure all the staples are as flat as possible.
8. To line up the pilot holes on the base and post, drill the screws up through the base until they poke out the top of the pilot holes. Insert the tips into the pilot holes of the post, and screw the two pieces together.
8. Cat-shaped scratcher

Get creative with this clever cat-shaped scratcher. It's adorable, it's functional, it won't take up a lot of space. And, it's fairly easy to make. This one is courtesy of Salty Canary, who made this in the hopes her cat would prefer it to the new velvet sofa!
Here's how to make the cat-shaped cat scratcher:
- Cardboard
- Exacto Knife
- Ruler
- Marker
- Duct Tape
- Scissors
- Epoxy
- Optional: Pink Paint
Directions:
1. Cut your cardboard into 3-5" strips - the smaller the strip, the lower it is to the ground.
2. Take the strip and roll it into a coiled circle and tape it closed.
3. Keep one edge of the rolled carboard circle flat to make sure it looks nice when complete.
4. Keep wrapping strips of cardboard around the circle until you have the size you want. This is the cat head!
5. Make ears by folding a piece of cardboard in half, then a smaller piece, and then a smaller piece until you have several layers. Duct tape the ears to the head.
6. You can paint the ears pink or wrap the outside in fabric!
9. PVC pipe cat scratcher
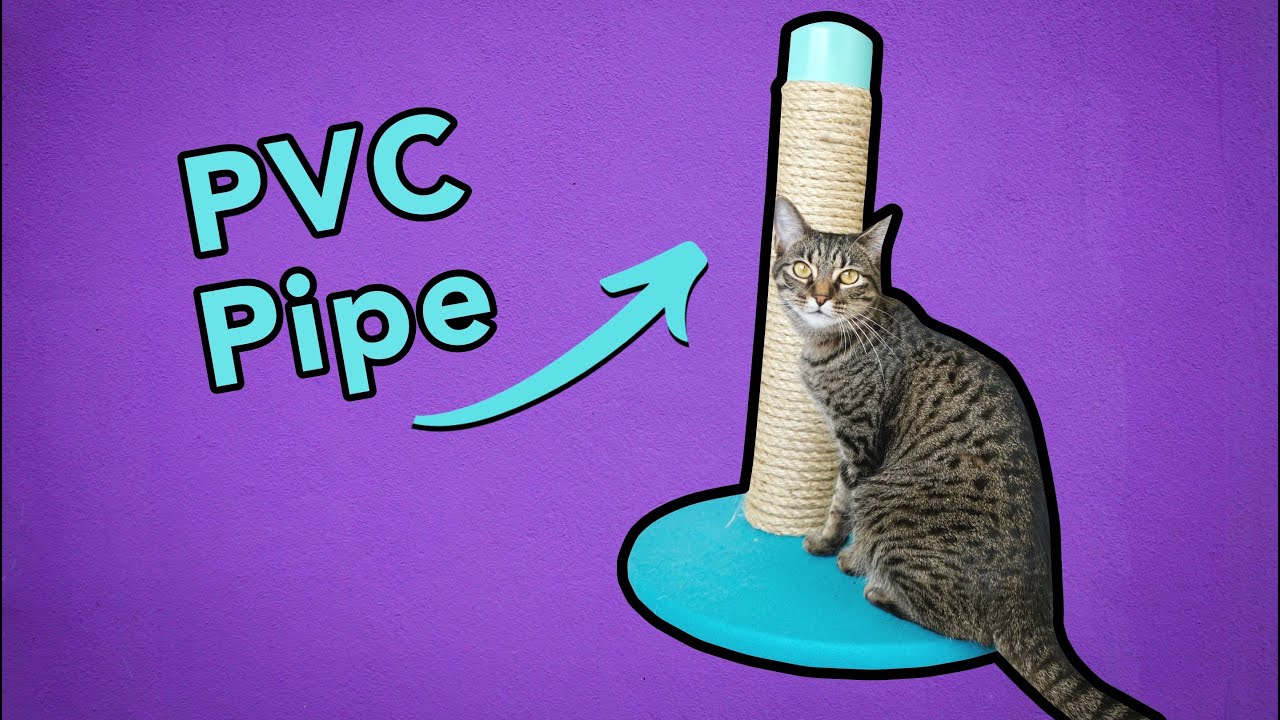
Courtesy of Mother Daughters Projects DIY, this is a very involved project that includes taking PVC pipes and making a cat scratcher out of them. While it's certainly a more time-consuming project than the average DIY, we imagine this will be one of the more sturdier scratching posts you could create.
To make it, you will need:
- 3” PVC Pipe
- 3” PVC Cap
- 50’ 3/8” Rope
- Wood Round
- Glue Gun
- Marking and Measuring Tool
- Gloves
- Variable-Speed Scroll Saw
- PVC Bits
- Compact Drill/Impact Combo Kit
- Felt
- Wood block
Directions:
1. Lay wood round on felt and measure a cut line, cut along it
2. Glue the felt to the wood round
3. Take a wood block and place the PVC pipe on top of it, trace the inside of the PVC pipe onto the wood block. Cut that circle out with a scroll saw or jigsaw. This will hold the PVC pipe in place.
4. Attack the wood circle to the felt-covered circle with two screws.
5. Pre drill holes in PVC pipe, place the pipe over the wood circle mounted to the felt base, then screw the PVC pipe into place.
6. Wrap rope around the PVC pipe, hot gluing along the way.
10. Cat scratching book board

Thanks to pet food company Hill's, this might just be the easiest DIY cat scratcher yet. You just need a few household items and you can easily make a scratcher for your cats in just a few minutes.
Here's how to do it and what you'll need:
- Large hardback coffee-table-sized book
- Large, cotton bath towel
- Heavy-duty thread
- Sewing needle
Directions:
1. Take the towel and fold it in half to double it up, then lay it flat on the floor
2. Place the book in the center of the towel and fold the towel over like you're wrapping a present.
3. Pull the towel taut and stitch together the seams.
You might also want to read: Why does my cat scratch the walls?

